How to Access Portal / Sign In
- You’ll receive an Online Portal Activation email or text message from your property management company. Click Activate Now in the email, or tap the link in the email, or tap the link in the text message to establish a strong password to activate your portal.
- You can also self sign up for the Online Portal at [Your-Property-Managers-Account-Name].appfolio.com/connect. Click Request access to the portal and input your information. The URL is unique to your property manager, but you may be able to find this on their company website or reaching out to your property manager directly.
- Bookmark, create a shortcut icon for the login page or download the mobile app so it is easy to return at any time.
- You will receive a confirmation email once your portal is activated.
Download the Mobile app to stay logged in to your Online Portal. Make payments, submit maintenance requests and review important documents 24/7.
- Download the iOS app from the App Store®

Apple and the Apple logo are trademarks of Apple Inc., registered in the U.S. and other countries. App Store is a service mark of Apple Inc. - Download the Android app from Google Play

Android, Google Play, and the Google Play logo are trademarks of Google Inc.
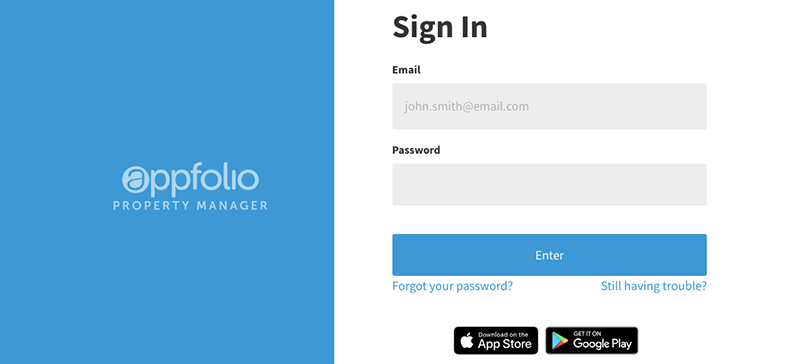
Log in here to access your Online Portal.
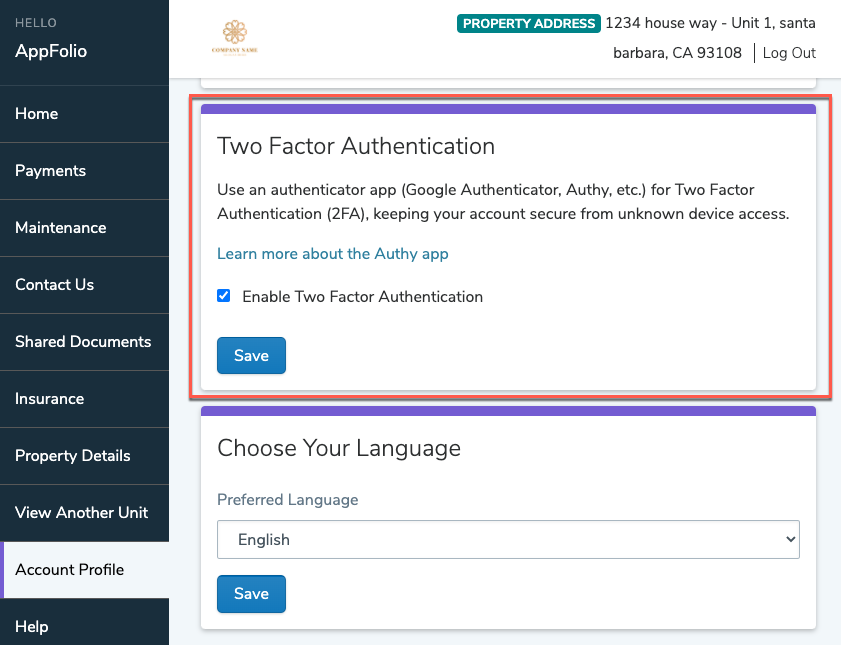
Enabling 2FA helps keep your Online Portal account secure in case your password is stolen. Click here to learn more.
- Enabling 2FA helps keep your Online Portal account secure in case your password is stolen. Click here to learn more.
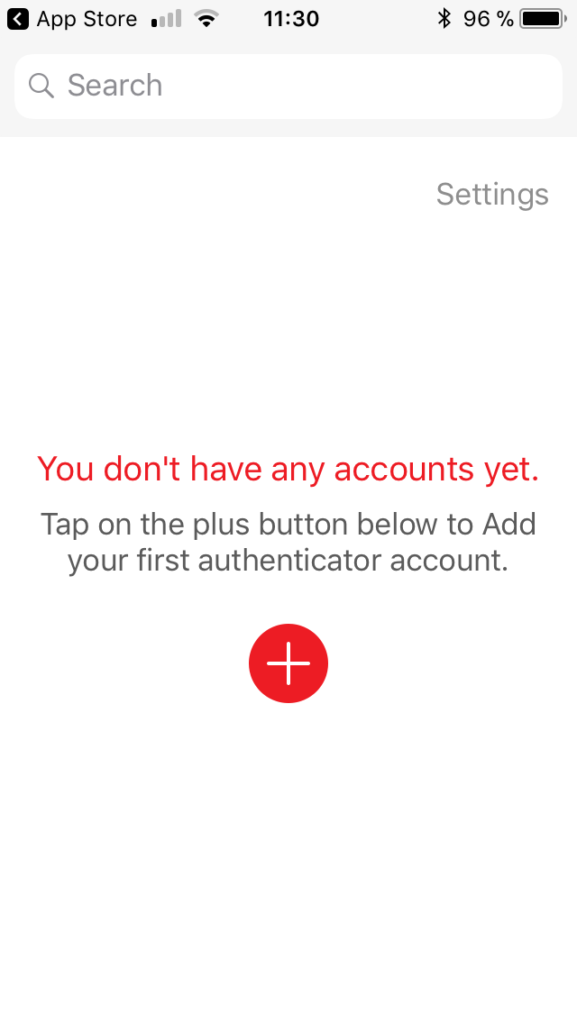
- You’ll need an authenticator app on your phone, (e.g. Authy). Use Authy on your phone to scan the QR code. You can also enter the authentication code manually in-app.
- Your Online Portal account should now be added to Authy. Enter the 6-digit code generated by Authy, and then hit Activate.
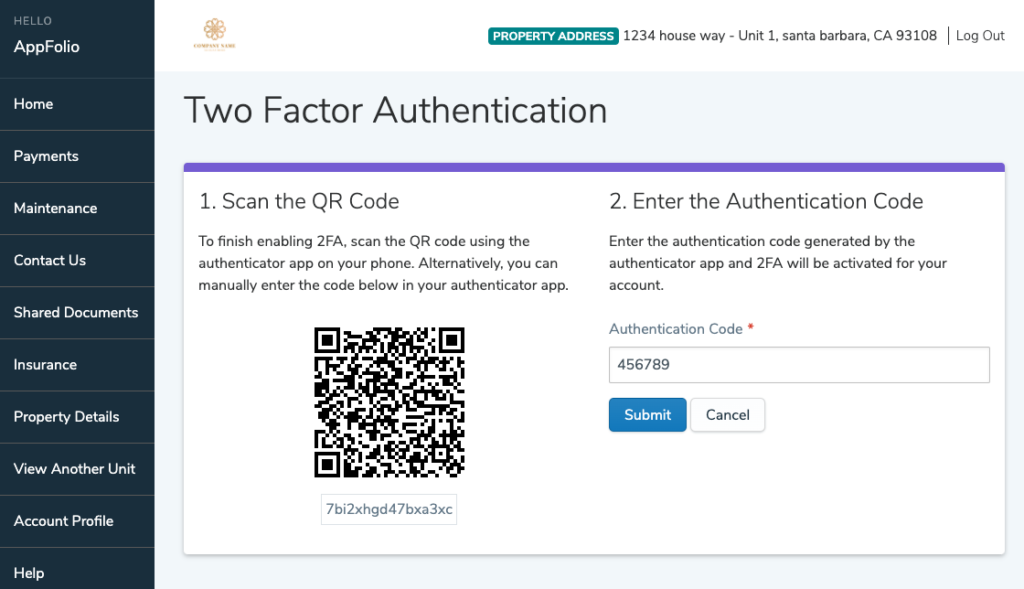
- Congratulations! 2FA is now activated for your account. If you have trouble signing into your account, please contact your property manager.
Our recommended browsers are Google Chrome or Mozilla Firefox. As of January 2016, Microsoft stopped providing updates to Internet Explorer. As a result, it is no longer capable of supporting the Online Portal.
Payments
If you see a message stating you cannot make online payments, please contact your property manager as this is a service they can choose to offer their tenants.
- On the Home or Payments tab, click Pay Now to make a one-time payment.
- If you have saved payment methods those will be displayed, or you can Create a New Payment Method.
- If you are creating a new payment method, you will select the payment method type: Credit or Debit Card or eCheck (direct withdrawal from bank account). You can then enter the associated payment information and click Continue
- Review the Payment Date and Payment Balance information for accuracy. If you are paying with a credit or debit card, the transaction fee will be displayed. You can switch to eCheck to avoid paying this fee if desired.
- Once you have verified all your payment information, click Make This Payment Now. You will receive a confirmation email once the payment is successfully submitted. The payment may take a few days to process and clear your account. If you didn’t receive a confirmation email your payment may not have been received, please reach out to your property manager.
If you see a message stating you cannot make online payments, please contact your property manager as this is a service they can choose to offer their residents.
- On the Home or Payments tab, click Set Up Autopay to create an automatically recurring payment
- If you have saved payment methods those will be displayed, or you can Create a New Payment Method.
- If you are creating a new payment method, you will select the payment method type: Credit or Debit Card or eCheck (direct withdrawal from bank account). You can then enter the associated payment information and click Continue.
- Give the payment a name, select whether you want to pay a fixed amount or your outstanding balance, choose the payment start date.
- Click Create Autopay. You will receive a confirmation email when your payment processes. You can review your autopay details on the Payments tab of your Online Portal.
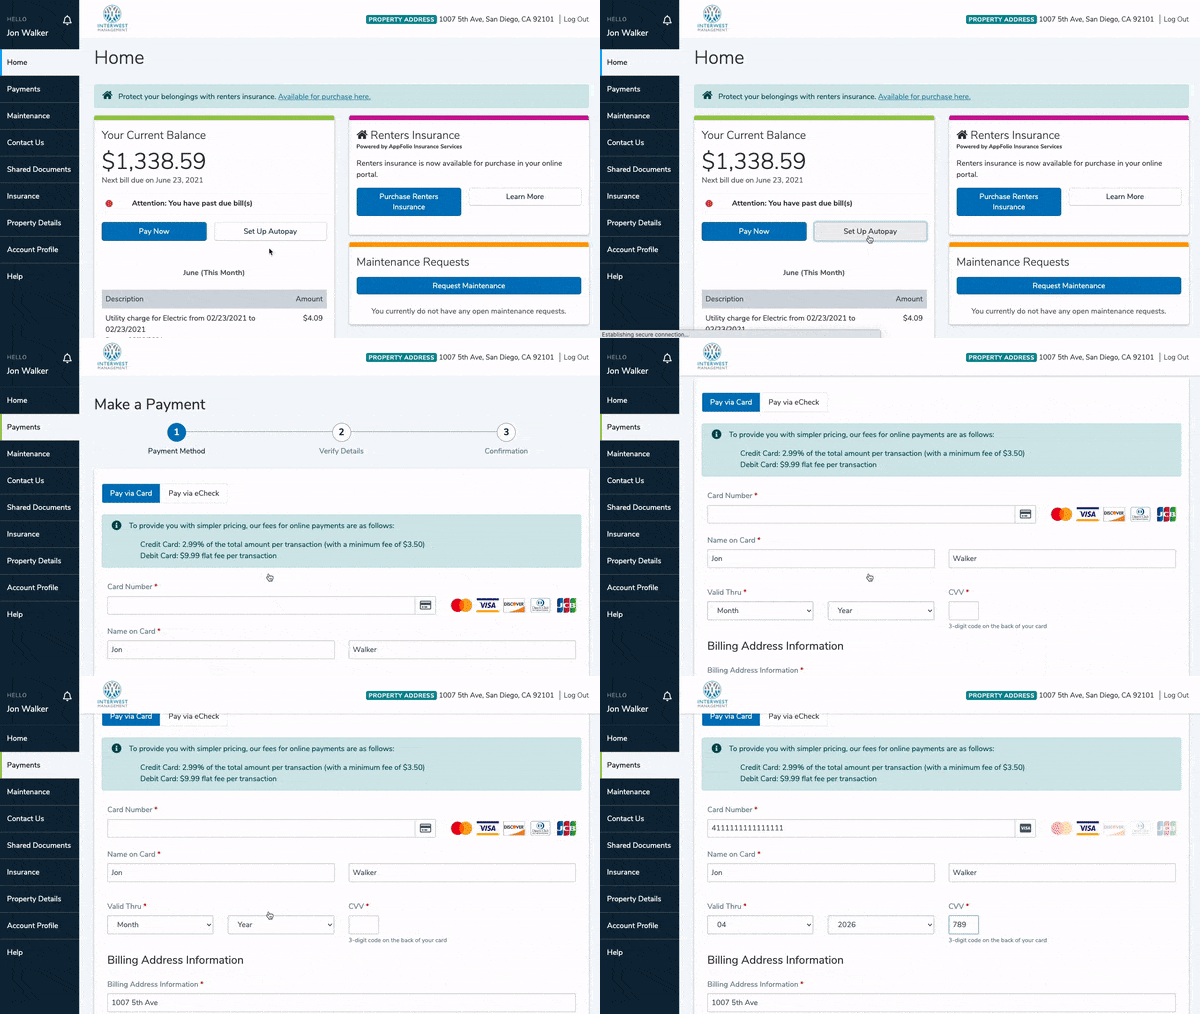
You can stop any future auto payments from processing by navigating to the Payments tab and locating the Scheduled Payments block. Select Delete on the auto payment you have created (you cannot delete payments created by your roommates). If you have already received a confirmation email that your payment has been processed this month when it shouldn’t have, you’ll need to reach out to your bank or credit card provider to issue a stop payment.
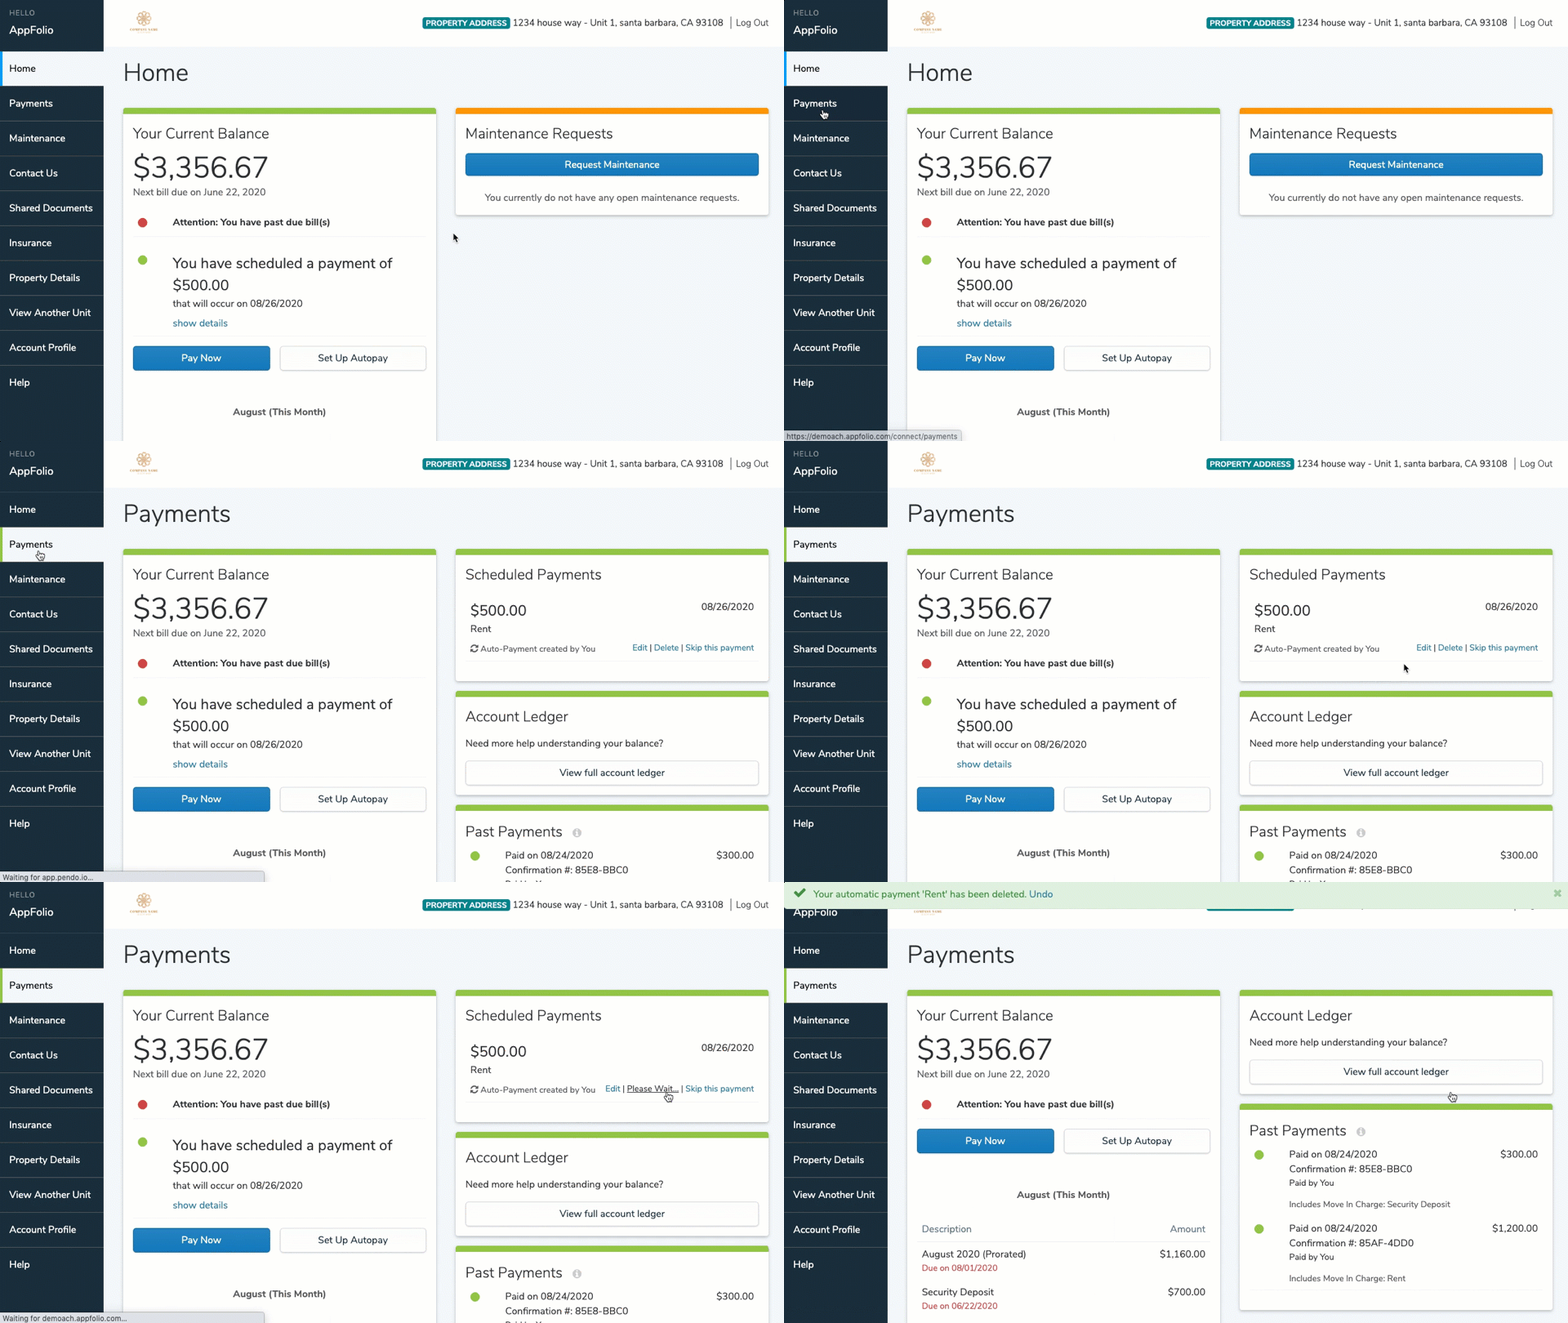
To skip the next month’s payment, navigate to the Payments tab and locate the Scheduled Payments block. click Skip this payment under the auto payment you have created (you cannot skip payments created by your roommates). The auto payment will resume after the skipped month.
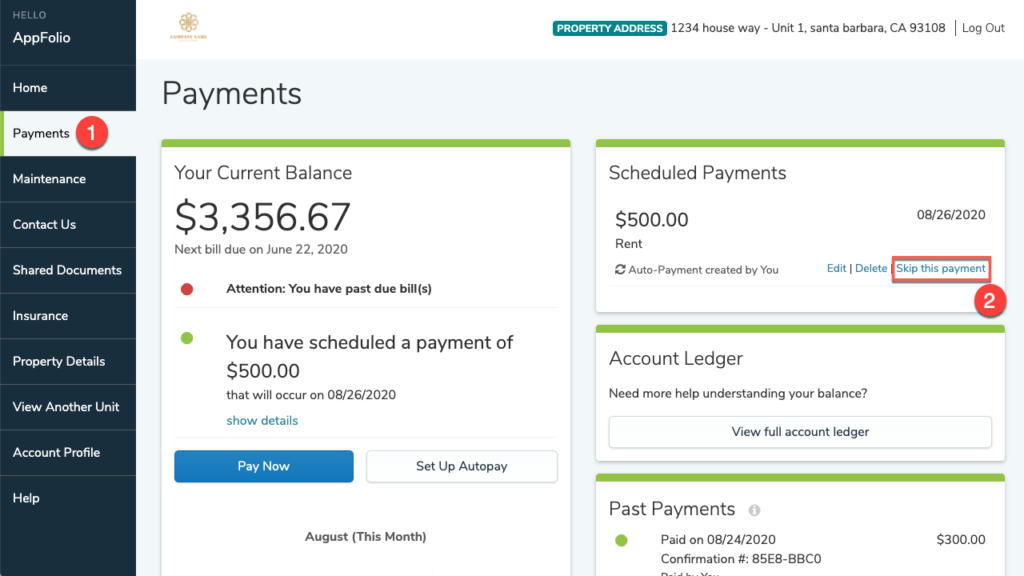
Navigate to the Payments tab and locate the Scheduled Payments block. Click Edit under the auto payment you have created (you cannot edit payments created by your roommates). Update the amount of the payment then click Save at the bottom of the page.
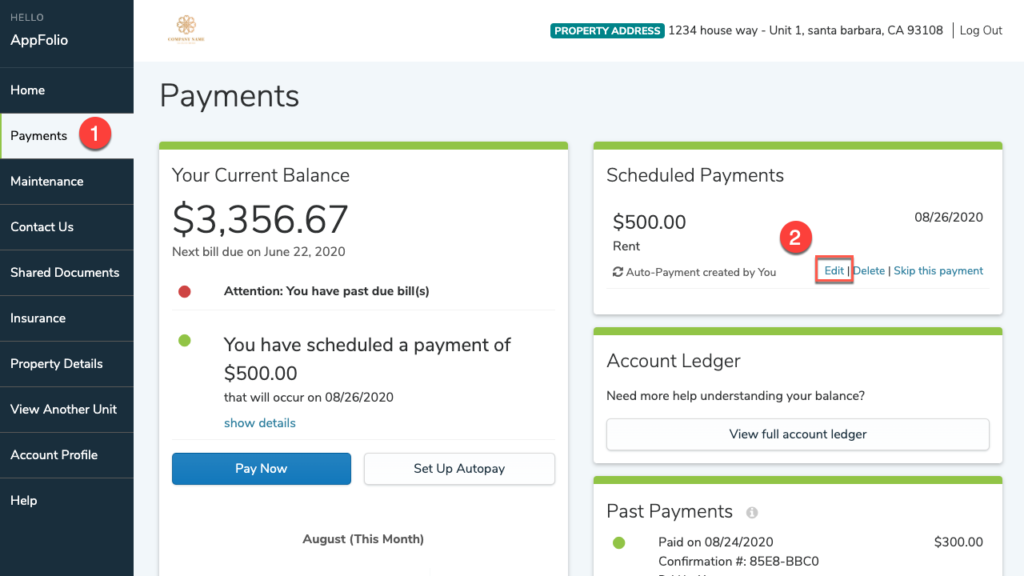
Navigate to the Payments tab and locate the Scheduled Payments block. Click Edit under the auto payment you have created (you cannot edit payments created by your roommates). Update the bank account or card information on file then click Save at the bottom of the page. If you are changing your auto payment from a credit/debit card to an eCheck (or vice versa), then you’ll need to delete your auto payment then create a new one.

Once a payment has been processed and you receive an email confirmation message, you will need to contact your bank or credit card provider to issue a stop payment. If you have an auto-payment set up, you may need to cancel any future payments.
Once a payment has been processed and you receive an email confirmation message, you will need to contact your bank or credit card provider to issue a stop payment. If you have an auto-payment set up, you may need to cancel any future payments.
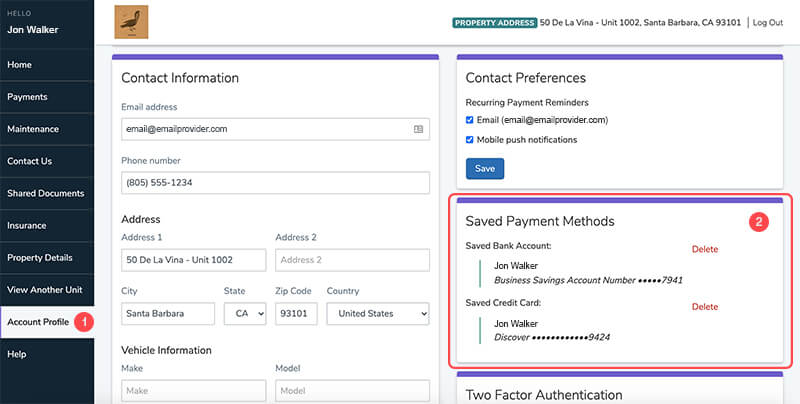
Yes, click the Account Profile tab and locate the Saved Payment Methods block. Under the saved payment method details, click the red Delete then click Yes, Delete to confirm.
eCheck payments are free to you, but there is a non-refundable transaction fee for paying with a debit or credit card in the Online Portal. You are notified of the fee amount before you submit the payment.
We take privacy and security seriously and invest in state of the art systems to protect payment information.
- A dedicated team monitors the security of our platform and infrastructure 24/7/365.
- All sensitive data is encrypted both in transit and at rest.
- Bank-grade security.
- Our security is regularly audited by third-party reviews.
- Our security is regularly audited by third-party reviews.
Please contact your property manager, as this is a service they can choose whether or not to offer their residents.
If you have received notice that you can pay by ‘Certified Funds Only,’ see below to learn about the payment options that may be available to you.
Certified Funds are a form of payment that is guaranteed to clear or settle by the company certifying the funds.
Examples of certified fund payments include the following:
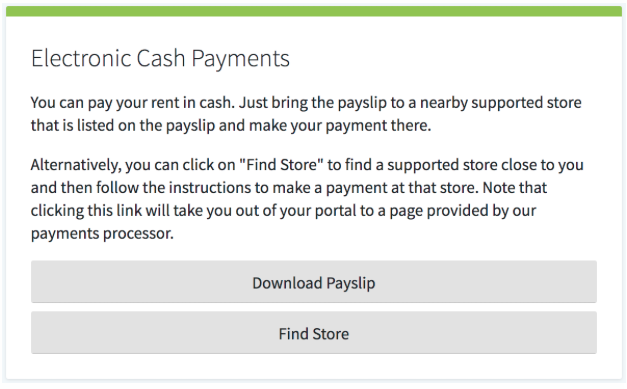
- Electronic Cash Payments – Your property manager can provide you with a unique and reusable payslip with a barcode to use when making cash payments at participating locations. The cost to make an electronic cash payments is $3.99 for up to $1,500.00 in cash.
- Cashier’s Check – Can be obtained from a bank or credit union
- Bank Money Order
- Cash
Contact your property manager to learn more about which certified fund payment options they accept.
You can find the electronic cash payment slip by navigating to the Payments tab, then clicking Download Payslip from the Electronic Cash Payments block. Alternatively, you may find your payslip as an attachment in your Shared Document tab.
 14
14
No. Your property manager cannot see any of the payment information you have saved or have previously en
Credit or debit card payments can be made from a Visa, Mastercard, JCB, Diners Club or Discover branded card from any country. American Express, gift cards, or prepaid cards are not accepted.
You can use a personal or business checking or savings account. Make sure to enter the routing and account number exactly as they appear on your checks and confirm the account has sufficient funds before paying.
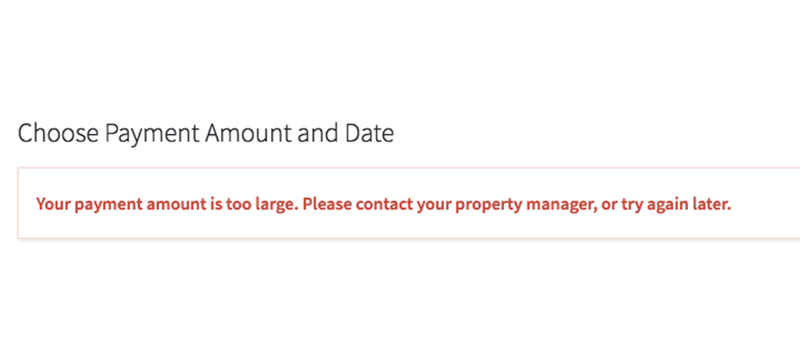
You are shown the maximum you can pay while making an Online Payment in the Online Portal. If you receive the error message “Your payment amount is too large. Please contact your property manager, or try again later” you may have hit a limit we put in place for fraud protection. Please ask your property manager to contact AppFolio about the issue.
You are shown the maximum you can pay at the time of payment in the Online Portal. The maximum amount allowed for a single credit or debit payment is shown in the table below:
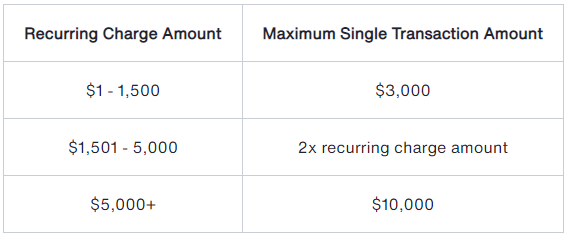
Please note, if your recurring charge amount increases or if you start paying for a new unit in the same Online Portal, the max allowed for a credit or debit card payment will not change. This only applies to payments made via credit or debit card, so you can switch to eCheck to pay a larger amount in one payment.
To increase the max amount you’re allowed to match your current recurring charge amount, please ask your property manager to contact AppFolio about the issue, but please know that your transaction fee will also increase.
eCheck payments appear as “[your management company]”. Credit or debit card payments plus the online portal transaction fee appear as “AF* [your management company].”
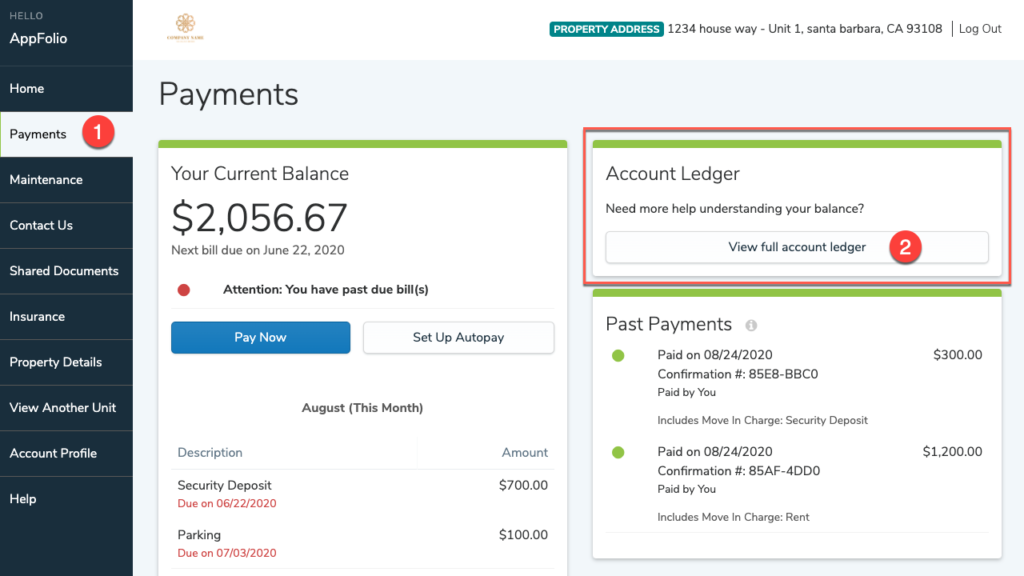
Please contact your property manager and they can provide you with a receipt. Alternatively, if you have made an online payment, you will be sent an email confirmation and you can also see a record of your payments on the Account Ledger found in the Payments tab.
Contact your property manager to learn about your payment options. In most locations, you are able to pay your rent in cash at a local 7-Eleven or Ace Cash Express. Your property manager can provide you with a unique and reusable payslip with a barcode to use when making cash payments at participating locations. The cost to make an electronic cash payments is $3.99 for up to $1,500.00 in cash.
Electronically Signing Leases
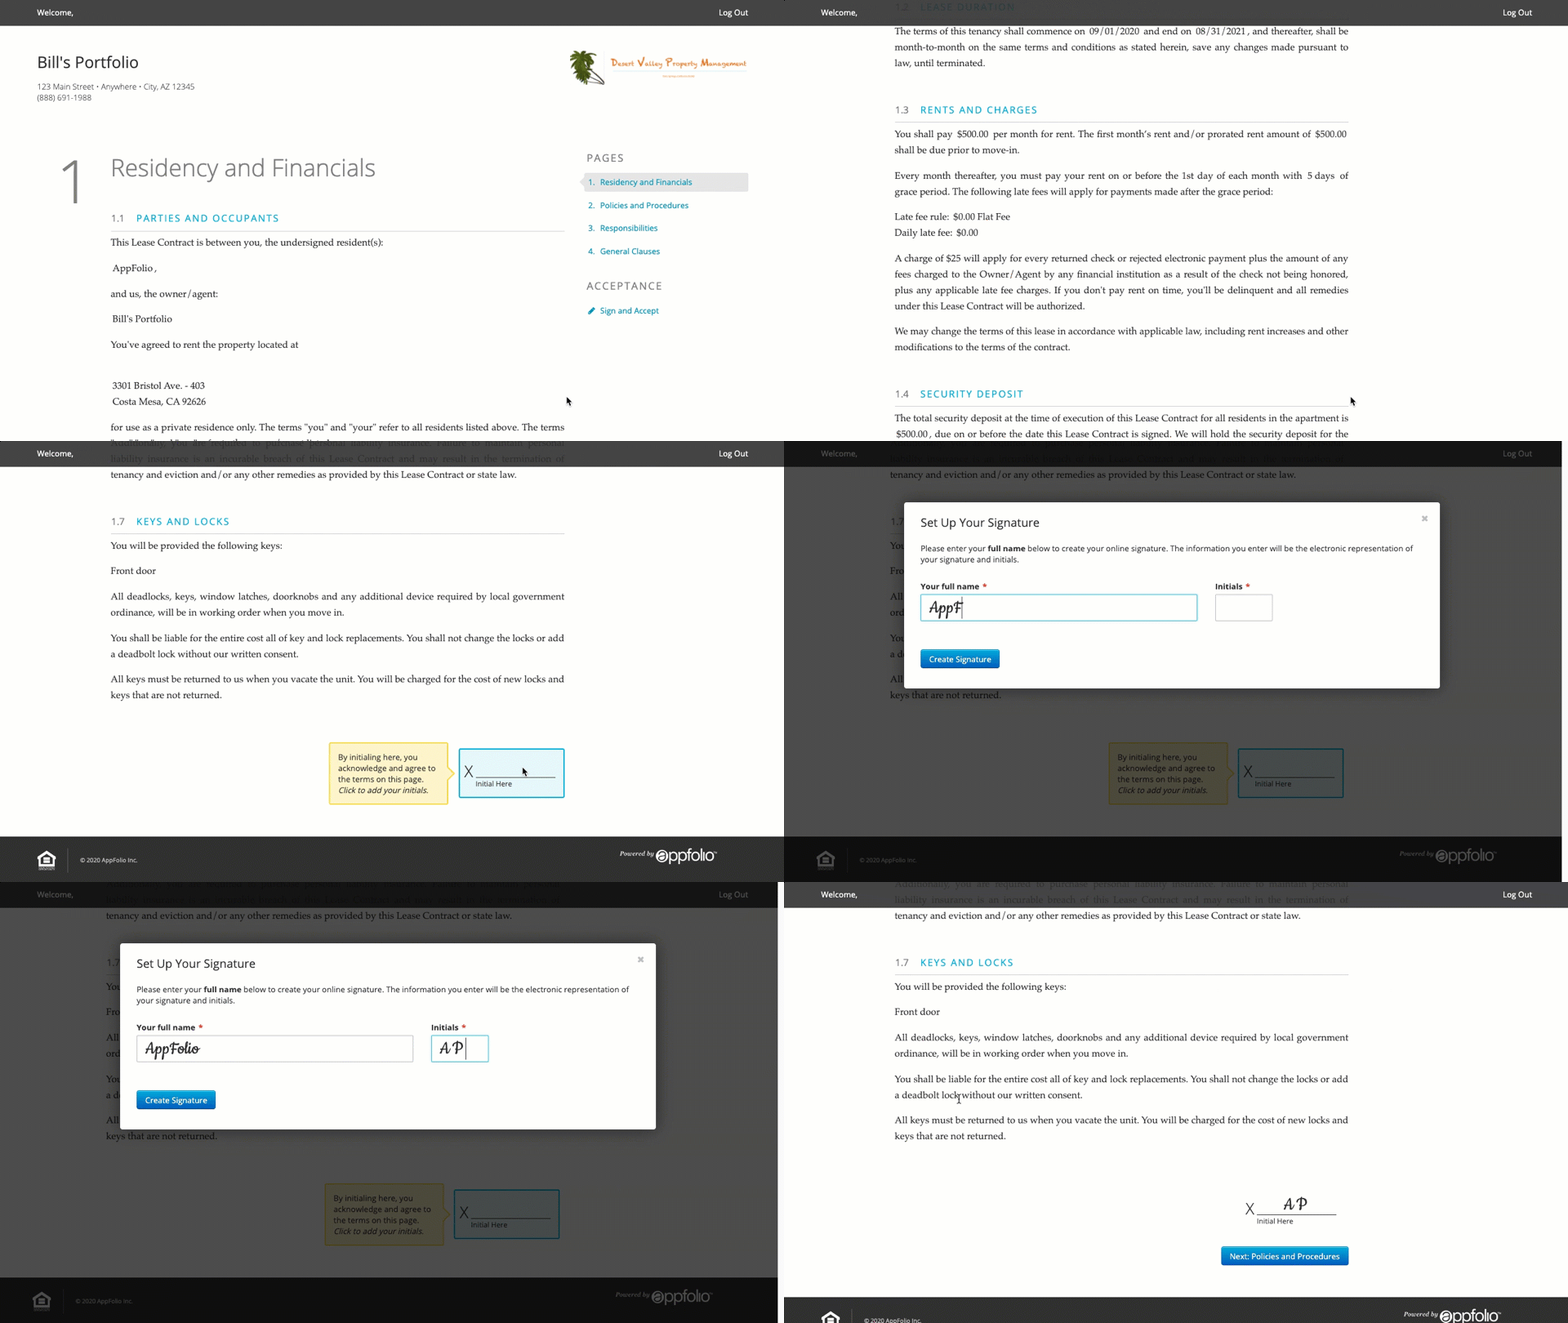
Your electronic lease will appear as soon as you log into your Online Portal. Read through the document carefully and select the first initial line you see. You will be prompted to enter your full name and initials to create your electronic signature. As you read through your lease, click every initial and signature line that you see to provide your electronic signature until you have reached the end of the document.
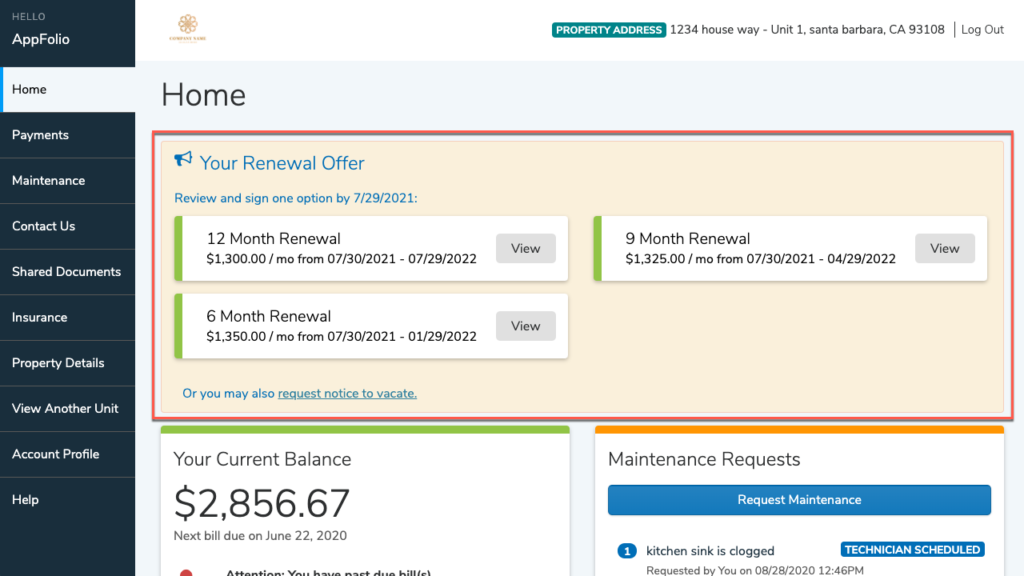
If you received an email that you have a lease renewal offer in your Online Portal, you can review the lease details on the Home tab of your portal. Review the offer(s) in the banner, then click View to begin signing the renewal offer of your choice.
Your lease will display when you log in to the Online Portal. If you have dismissed it to sign it later, you will need to log out and log back in for it to appear again.
If your property manager has contacted you saying you have not finished signing your lease document, you have likely missed an initial line either in the middle or at the bottom of a page. Scan through each page of the document to locate the missing signature or initial line. There will be an initial line at the bottom of every page (including addenda) and a final Sign and Accept page where you will provide your full signature.
Navigate to the Account Profile tab of your Online Portal, then click Edit Electronic Signature in the Signature block. Enter your legal full name and initials, then click Save.
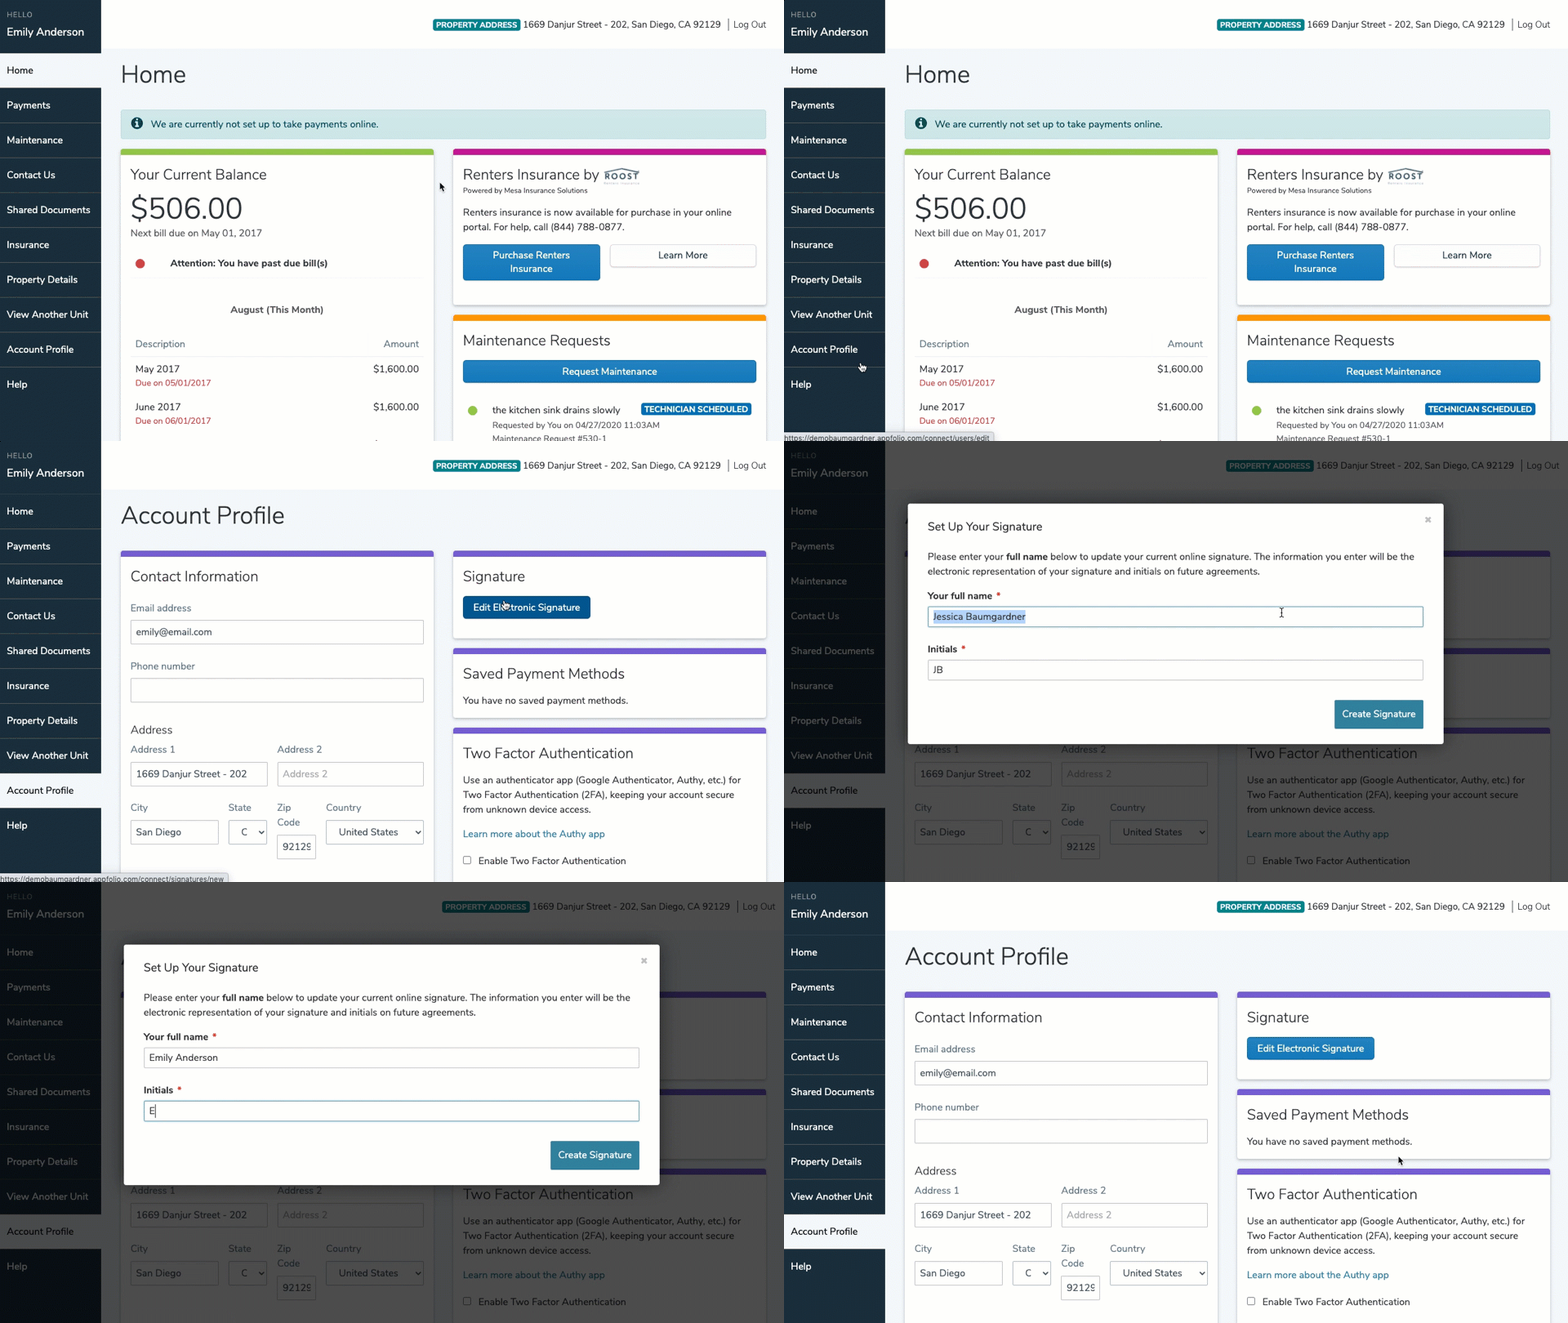
How to Edit Your Account Details
Navigate to the Account Profile tab and locate the Contact Information block. Here you can update the email address you use to log into your account, the phone number, mailing address, and vehicle information your property manager has on file for you.
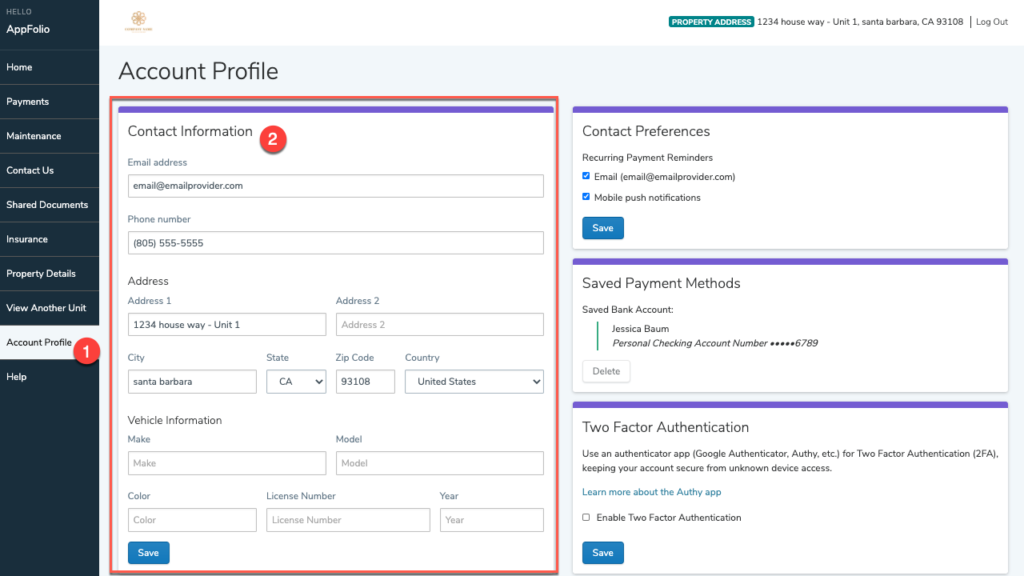
Please contact your property manager and ask them to delete the login information associated with your account.
Navigate to the Account Profile tab of your Online Portal and locate the Password block. Enter your current password, then enter your new password & retype it. Click Save when done. Passwords must be between 8 and 32 characters in length which includes at least one letter and one number or symbol.
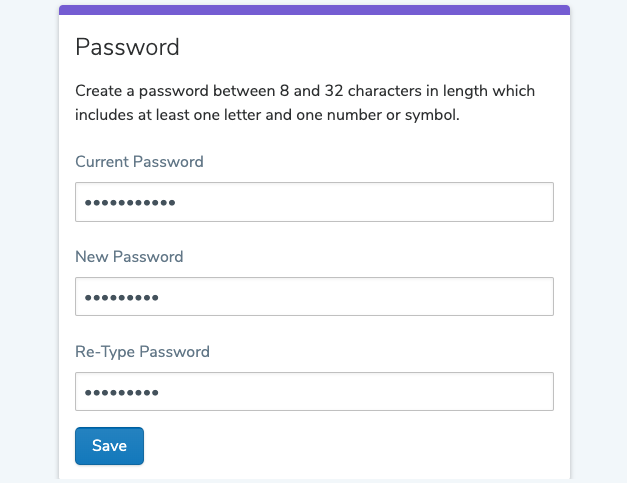
You can change the language to Spanish. Click the Account Profile tab on the left, then in the Choose Your Language section use the menu to select Spanish, then click Save.
Your property manager can choose whether or not you can give notice through the Online Portal. If this feature is enabled you can find it on the Contact Us tab. Select Request Notice to Vacate in the Contact Options block. Provide your desired move out date, your reason for leaving, and your forwarding address (if you have it), then click Submit. If your property manager does not offer this feature, you’ll need to contact them directly.
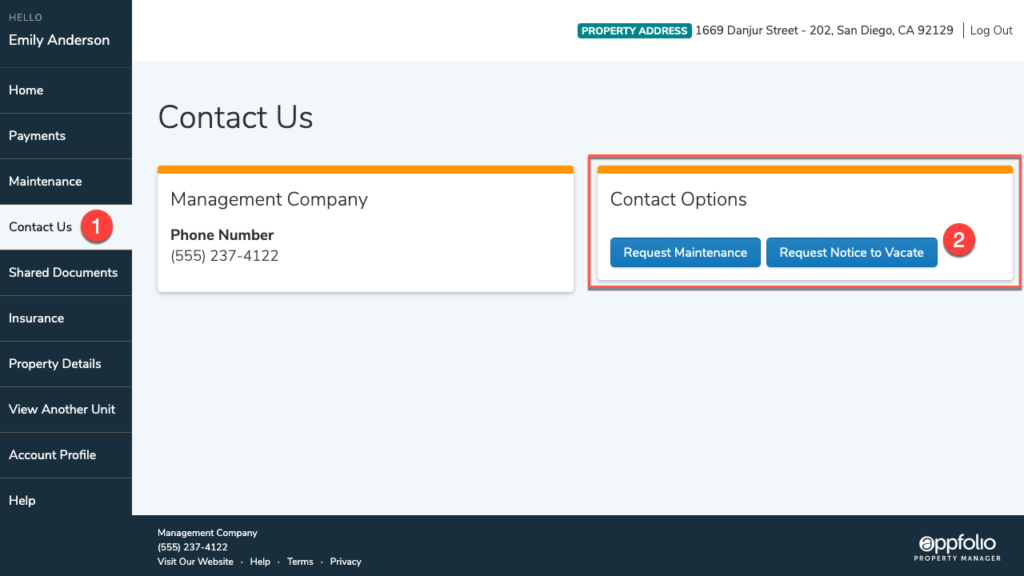
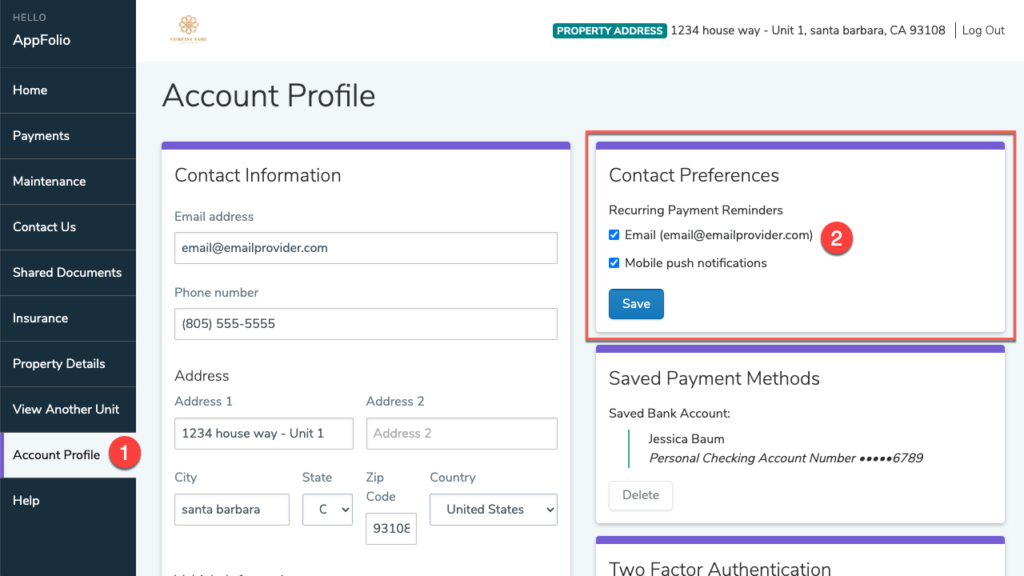
Yes, you can set up either email reminders or mobile push notifications if you have the Online Portal app on your phone. Navigate to the Account Profile tab of the Online Portal, then in the Contact Preferences block, select what kind of recurring payment reminders you would like to enable, then click Save.
Submit / Check On a Maintenance Request
Submit maintenance requests directly to your property manager along with photos of the issue. Please Note, if you do not see this task, contact your property manager as this feature may not be enabled for their account.
- Navigate to the Maintenance tab, and select Request Maintenance.
- Enter a detailed description of the issue, upload one or more photos of the item needing attention (must select multiple photos at once from computer or camera roll), decide whether or not to give the property manager permission to enter with their key, then click Submit Request.
- On the next screen, select when a maintenance tech can address your maintenance issue. If you choose to provide preferred times, select 3 or more time slots, then click Submit.
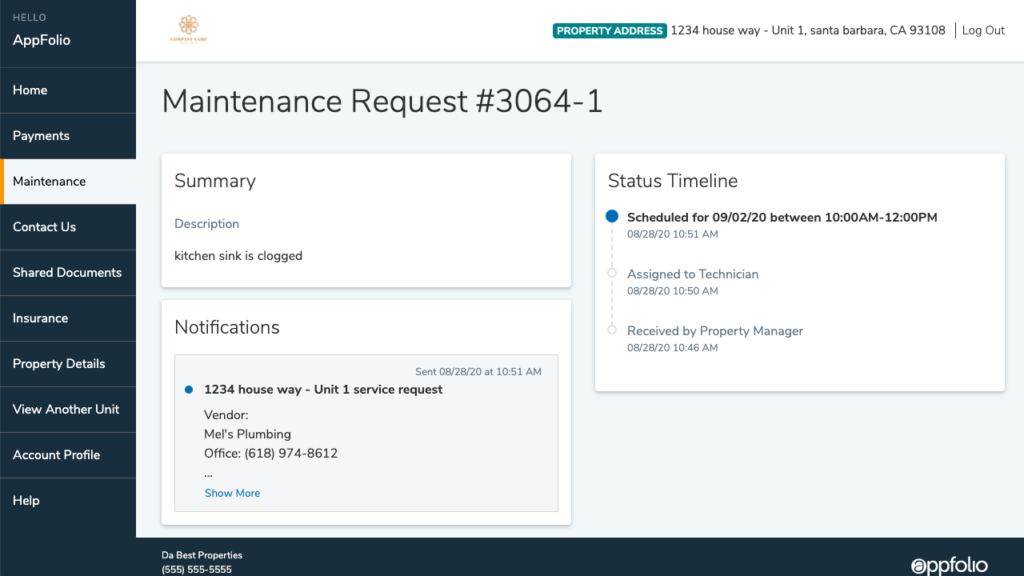
You can view the high-level status of your maintenance request on the Maintenance tab. The status will range from received, to technician contacted, to technician scheduled, to completed. Select Check Status for a detailed view of all communication sent to you and a status timeline of your request.
View or Download Documents
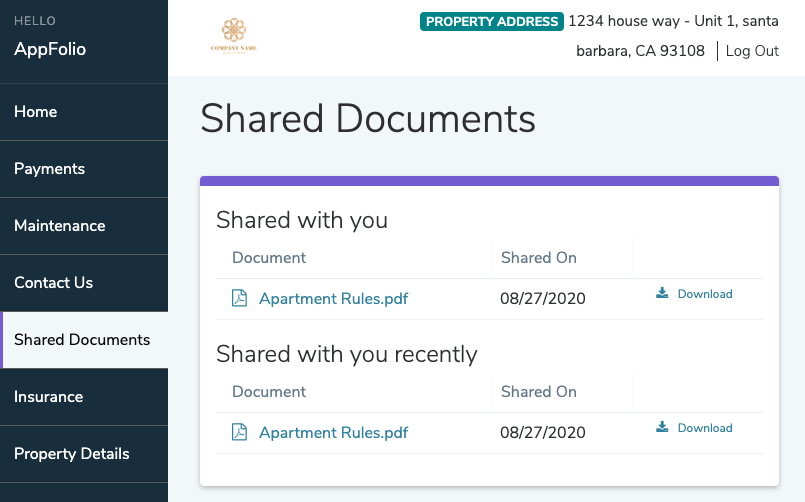
You’ll receive an email notification any time your property manager sends you a document securely to your Online Portal. Navigate to the Shared Documents tab to access these documents.
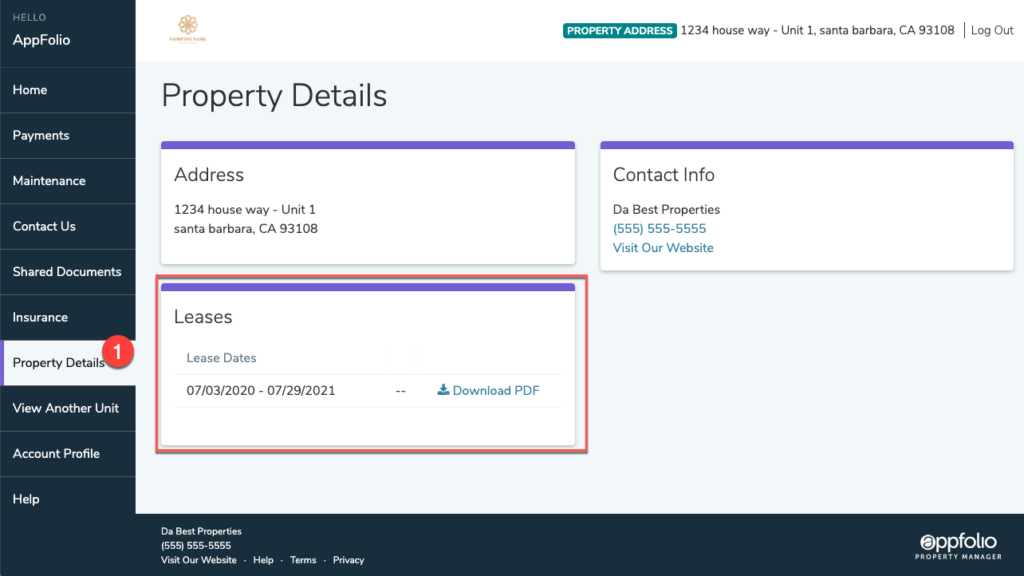
Click Property Details from the menu on the left to view or download your online lease documents.
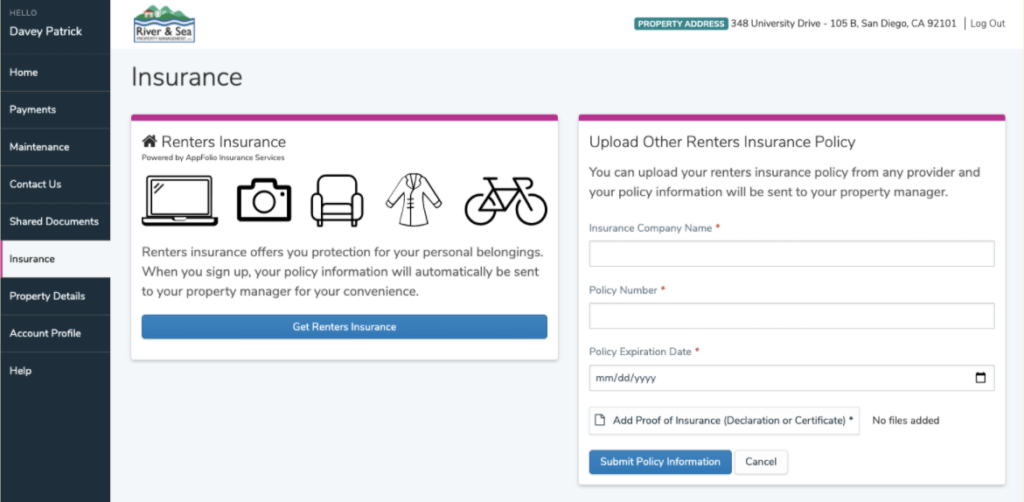
Navigate to the Insurance tab and locate the Upload Renters Insurance Policy block. Enter your insurance company provider, your policy number, policy expiration date, then upload a copy of your proof of insurance. When done click Submit Policy Information.
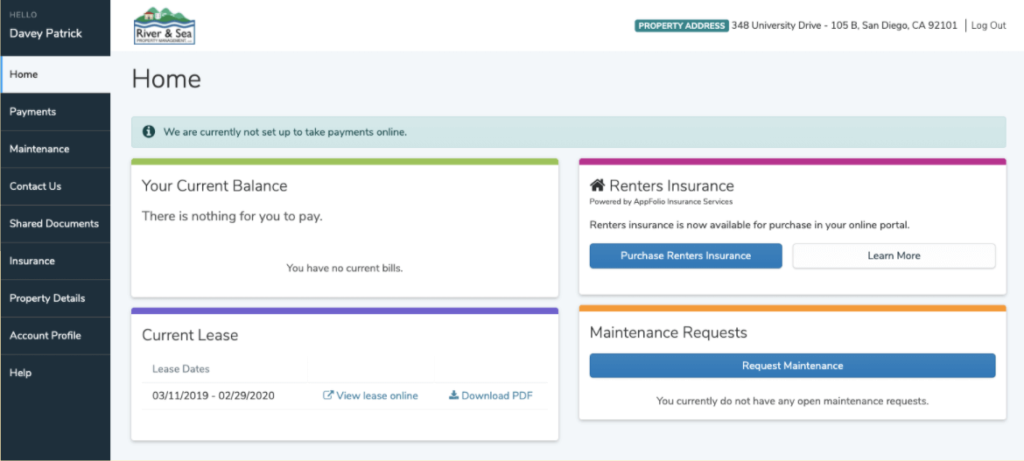
If your property management company has this feature enabled, you can purchase a renters insurance policy directly through your online portal. Navigate to the Home tab and click Purchase Renters Insurance to receive an estimate.
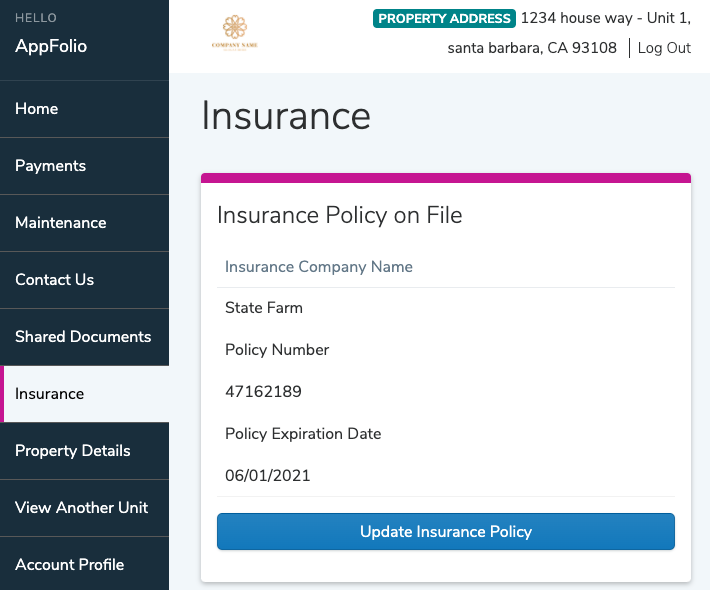
Navigate to the Insurance tab to view or update your renters insurance policy.
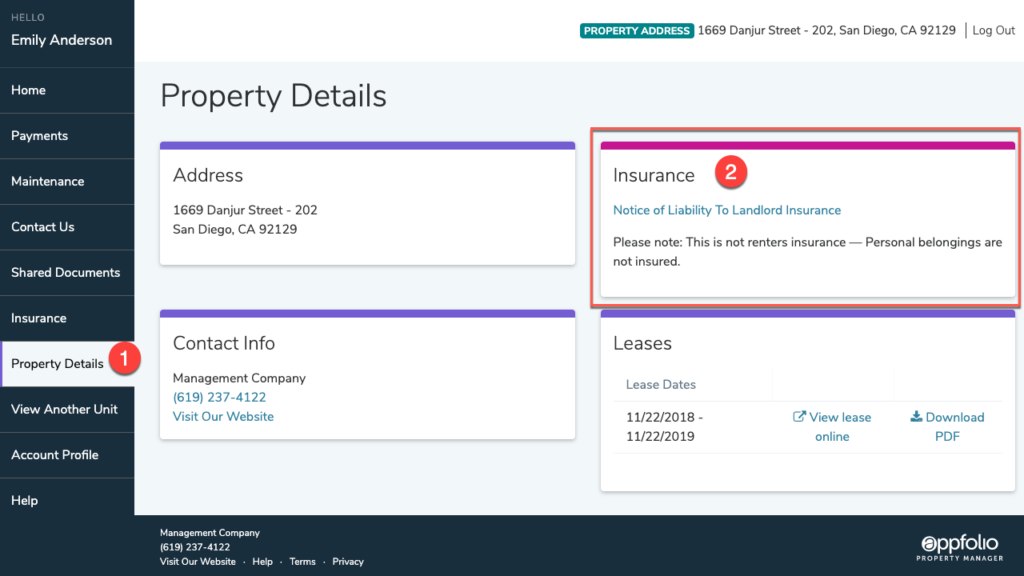
If your property management company has enrolled you in Liability to Landlord Insurance, you will see a Notice of Liability to Landlord Insurance link on the Property Details tab. Click this link to view your summary of coverage.
View Another Unit
Only your property manager is capable of combining your Online Portals, so please contact them directly to make this request. Your Online Portals must be managed by the same company in order to combine them
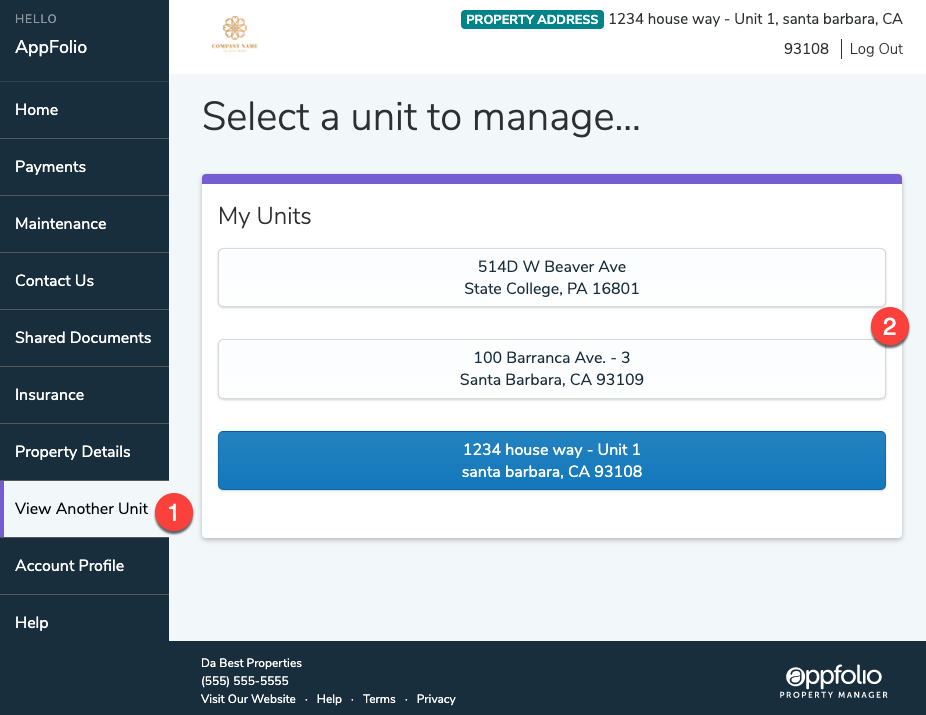
If you rent multiple units from your property management company and you wish to make payments or details for a different unit, click View Another Unit, then click the button for the unit you wish to view. Each unit must be activated separately, so if you don’t see the unit you’re looking for, contact your property manager.
